You know the saying…the cobbler’s children have no shoes. That pretty much sums up my own house and the lack of decorating I’ve been able to do while working on other people’s homes.
But I finally decided to do a long overdue mini makeover one room at a time, starting with my master bedroom. I didn’t really have a lot of room in the budget, which is always challenging when trying to makeover a room! But for $150 and 24 hours, I think I did pretty well!

After six years in our house, we still had the builder white (or cream) walls. We wanted to take the room from Country Cottage to Urban Sophistication.

I think the biggest impact in the room was paint. I chose a subtle gray from Benjamin Moore called Gray Huskie that I had color matched at Lowe’s. Keep in mind that I didn’t replace any of my original furniture. The paint really helps the furniture stand out.
I saved a lot of money by painting myself. It really wasn’t that bad…took me about 5 hours from start to finish. The biggest trick to painting a room is to do all of the brush work first and then do the rolling.

We mounted our flat screen on the wall before the makeover but that was actually a pretty easy project as well. We found our mounting kit online which saved us over half the cost of buying in the store.
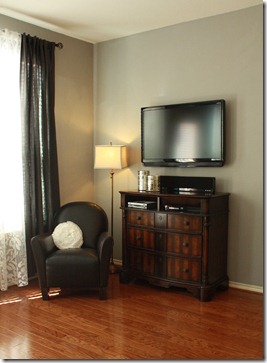
Besides paint, the only other purchases were the area rug, which I snagged for $55 at Ross and the charcoal drapes that were $25 for a 2 pack at IKEA.

All of the accessories around the room were items that I already from other areas of the house, with the exception of my champagne hammered lamp on my bedside chest that I scored at a thrift for $9.00! The lamp shade is from Target.

My vanity and fiddle back antique chair was a thrift find as well that I refinished in a weathered warm silver. The chair was about to go in the dumpster and I convinced the store to let me have it for $1.

I still have a few more odds and ends to finish up in the room. I’m hoping to paint my doors leading into the bathroom a shiny black and change out the hardware to crystal door knobs.

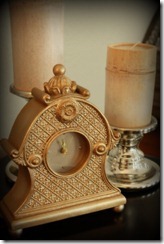
I repainted a wooden carved lamp and accent clock to match the new room as well. Soon I hope to take old frames and add a gallery wall of family pictures above the dresser.

My bedding and accent pillows were all collected over the years at discount stores like HomeGoods and T.J. Maxx. They weren’t new for this makeover but with the cream walls before, they were washed out and didn’t “pop” like they do now.

My last item to complete the new look will be to upholster a French style thrift chair in a fun pop of color like the sofa below.

Rebecca Sofette $1495 shown above
I’m so happy about my $150 makeover that I’m getting motivated to update the rest of my house, room by room.
Need design help? Find out more.
But I finally decided to do a long overdue mini makeover one room at a time, starting with my master bedroom. I didn’t really have a lot of room in the budget, which is always challenging when trying to makeover a room! But for $150 and 24 hours, I think I did pretty well!

After six years in our house, we still had the builder white (or cream) walls. We wanted to take the room from Country Cottage to Urban Sophistication.

I think the biggest impact in the room was paint. I chose a subtle gray from Benjamin Moore called Gray Huskie that I had color matched at Lowe’s. Keep in mind that I didn’t replace any of my original furniture. The paint really helps the furniture stand out.
I saved a lot of money by painting myself. It really wasn’t that bad…took me about 5 hours from start to finish. The biggest trick to painting a room is to do all of the brush work first and then do the rolling.

We mounted our flat screen on the wall before the makeover but that was actually a pretty easy project as well. We found our mounting kit online which saved us over half the cost of buying in the store.

Besides paint, the only other purchases were the area rug, which I snagged for $55 at Ross and the charcoal drapes that were $25 for a 2 pack at IKEA.

All of the accessories around the room were items that I already from other areas of the house, with the exception of my champagne hammered lamp on my bedside chest that I scored at a thrift for $9.00! The lamp shade is from Target.

My vanity and fiddle back antique chair was a thrift find as well that I refinished in a weathered warm silver. The chair was about to go in the dumpster and I convinced the store to let me have it for $1.

I still have a few more odds and ends to finish up in the room. I’m hoping to paint my doors leading into the bathroom a shiny black and change out the hardware to crystal door knobs.

I repainted a wooden carved lamp and accent clock to match the new room as well. Soon I hope to take old frames and add a gallery wall of family pictures above the dresser.


My bedding and accent pillows were all collected over the years at discount stores like HomeGoods and T.J. Maxx. They weren’t new for this makeover but with the cream walls before, they were washed out and didn’t “pop” like they do now.

My last item to complete the new look will be to upholster a French style thrift chair in a fun pop of color like the sofa below.

Rebecca Sofette $1495 shown above
I’m so happy about my $150 makeover that I’m getting motivated to update the rest of my house, room by room.
Need design help? Find out more.


